A while back, we looked at setting up a CentOS 8 CIFS file server with Active Directory Authentication. This blog will go through the same exercise, except using Ubuntu Linux 20.04 LTS. While there are many approaches to making this setup work, we will look at using winbind authentication with Samba.
%20FILE%20SHARING%20WT%20UBUNTU%20LINUX%2020.04.jpg?width=673&name=ACTIVE%20DIRECTORY%20AUTHENTICATED%20CIFS%20(SAMBA)%20FILE%20SHARING%20WT%20UBUNTU%20LINUX%2020.04.jpg)
Notes
In the examples shown below the following assumptions are made:
- DNS for the Active Directory Domain is properly working and is used by the Ubuntu system being joined to the Domain.
- The Active Directory domain name is: contoso.com
- The Active Directory short domain name is: CONTOSO
- The Active Directory Domain Controllers are: addc1.contoso.com, addc2.contoso.com, addc3.contoso.com
- The account Administrator@contoso.com has Domain Admin rights
- The accounts username1 and username2 are both in Active Directory as regular users
- /shares/test is a test share that username2 and username2 are allowed to connect to
Getting Started
To start, we need access to Microsoft Active Directory Domain Controllers. This can be through Azure Active Directory Domain Services and a working connection (including proper DNS) to the provisioned DCs or with on-premises DCs. In our examples, we will use DCs that provide DNS for the subnet hosting the Ubuntu 20.04 file server.
In addition to the Microsoft requirements above, we also need the Ubuntu Linux server. This can be either a physical or virtual system. We will use a virtual Ubuntu 20.04 basic server install with no optional packages added. Then always make sure to start with a fully patched system, which can be done with:
sudo apt update
sudo apt upgrade
If kernel updates are installed from the command above, the server should be rebooted before proceeding further.
We need to install the following packages:
sudo apt install samba samba-common samba-dsdb-modules \
samba-vfs-modules winbind libnss-winbind libpam-winbind \
krb5-config
Also, install any dependencies apt asks for. We will automatically get a configuration wizard:
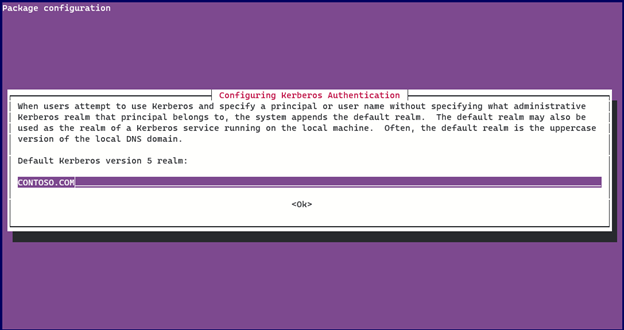
Now we are ready to configure Kerberos. The /etc/krb5.conf file should look like this:
[logging]
default = FILE:/var/log/krb5libs.log
kdc = FILE:/var/log/krb5kdc.log
admin_server = FILE:/var/log/kadmind.log
[libdefaults]
dns_lookup_realm = false
dns_lookup_kdc = true
ticket_lifetime = 24h
renew_lifetime = 7d
forwardable = true
rdns = false
spake_preauth_groups = edwards25519
default_realm = CONTOSO.COM
default_ccache_name = KEYRING:persistent:%{uid}
pkinit_anchors = FILE:/etc/ssl/certs/ca-certificates.crt
[realms]
CONTOSO.COM = {
kdc = addc1.contoso.com
kdc = addc2.contoso.com
kdc = addc3.contoso.com
default_domain = contoso.com
}
[domain_realm]
.contoso.com = CONTOSO.COM
contoso.com = CONTOSO.COM
[plugins]
localauth = {
module = winbind:/usr/lib/x86_64-linux-gnu/samba/krb5/winbind_krb5_locator.so
enable_only = winbind
}
sudo mv /etc/krb5.conf /etc/krb5.conf.orig
sudo vi /etc/krb5.conf
Next, we want to configure Samba, and Winbind. The configuration file should be similar to this:
[global]
log level = 0
socket options = TCP_NODELAY
winbind enum users = yes
winbind enum groups = yes
winbind refresh tickets = yes
winbind use default domain = yes
winbind offline logon = yes
vfs objects = acl_xattr
map acl inherit = yes
store dos attributes = yes
os level = 20
preferred master = no
winbind separator = +
max log size = 50
log file = /var/log/samba/log.%m
dns proxy = no
security = ads
wins server = addc1.contoso.com
wins proxy = no
idmap config *:backend = tdb
idmap config * : range = 3000-7999
idmap config CONTOSO : backend = rid
idmap config CONTOSO : schema_mode = rfc2307
idmap config CONTOSO : range = 10000-9999999
idmap config CONTOSO : unix_nss_info = yes
idmap config CONTOSO : unix_primary_group = yes
kerberos method = secrets and keytab
dedicated keytab file = /etc/krb5.keytab
realm = CONTOSO.COM
workgroup = CONTOSO
password server = addc1.contoso.com
load printers = no
printing = bsd
printcap name = /dev/null
disable spoolss = yes
[testshare]
comment = Test Share
path = /shares/test
browseable = yes
read only = no
inherit acls = yes
inherit permissions = yes
create mask = 700
directory mask = 700
valid users = @"CONTOSO+Domain Users" CONTOSO+username1 CONTOSO+username2
admin users = @"CONTOSO+Domain Admins"
To configure Samba and Winbind:
sudo mv /etc/samba/smb.conf /etc/samba/smb.conf.orig
sudo vi /etc/samba/smb.conf
We should also make sure our testshare folder exists:
sudo mkdir -p /shares/test
Next, we need to edit /etc/nsswitch.conf
sudo vi /etc/nsswitch.conf
Edit the passwd: and group: lines to look like (adding “winbind” before “systemd”:
|
passwd: files winbind systemd group: files winbind systemd |
Now we can join the Active Directory Domain:
sudo net ads join -U Administrator
Now start Samba:
sudo systemctl enable --now smbd
sudo systemctl enable –-now nmbd
sudo systemctl enable –-now winbind
After Samba is running, we can query AD for user information:
sudo getent passwd "CONTOSO\Administrator"
Should return something like:
CONTOSO\administrator:*:2000500:2000513::/home/administrator@CONTOSO:/bin/bash
Troubleshooting
Troubleshooting authentication issues can be particularly frustrating.
- In the smb.conf file above increasing the logging level can help pinpoint problems.
- You can look at the log in /var/log/samba/log.smbd
- Double-check the DNS is correct and the domain controller is resolved properly
- Make sure your Ubuntu server is showing up in Active Directory Users and Computers
- The file /var/log/secure will show authentication errors
- Use the “wbinfo”, "id" and "getent" programs to confirm if account information is passing to the system.
If you want to discuss further, contact iuvo Technologies today!