You may already be familiar with Microsoft OneDrive. OneDrive is Microsoft's powerful and secure cloud-based service for storing files. OneDrive is part of the Microsoft Office 365 suite, and with OneDrive you will have the ability to view, edit, and even share your documents anywhere you can sign in to office.com via your web browser. With OneDrive, changes being made to a document are always being tracked which makes it possible to keep a close eye on everything that’s happening with specific files, providing an auditing and file recovery advantage as well.
.png?width=645&height=645&name=Untitled%20design%20(55).png)
OneDrive manages and protects your files, along with powering content collaboration across Microsoft 365. With OneDrive, you will find the process of accessing, organizing, uploading, viewing, and even sharing files easy and straightforward.
Benefits of OneDrive
To reap the full benefits of OneDrive, it is essential that the health of OneDrive running on your machine be in top form. Starting with the basics – OneDrive needs to be running in order to provide full functionality. If OneDrive is not running on your machine, you are putting yourself at risk of not having your files successfully backed up, potentially uncaptured modifications made to documents, and hindering collaboration efforts which in this virtual day and age are so important. While it is simple to determine if OneDrive is running on your machine, it may also be easy to overlook when it is NOT. Therefore, below we have outlined the steps you can take in Microsoft Endpoint Management to create a Proactive Remediation Job to automatically do a OneDrive reset on end-user machines!
Troubleshooting Prior to OneDrive Reset
Steps to Follow
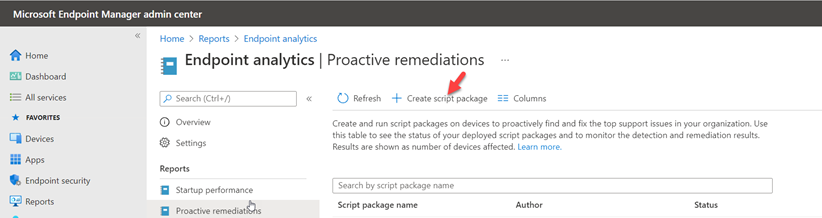
In Microsoft Endpoint Management, go to Reports > Endpoint analytics > Proactive Remediations. Select + Create Script Package
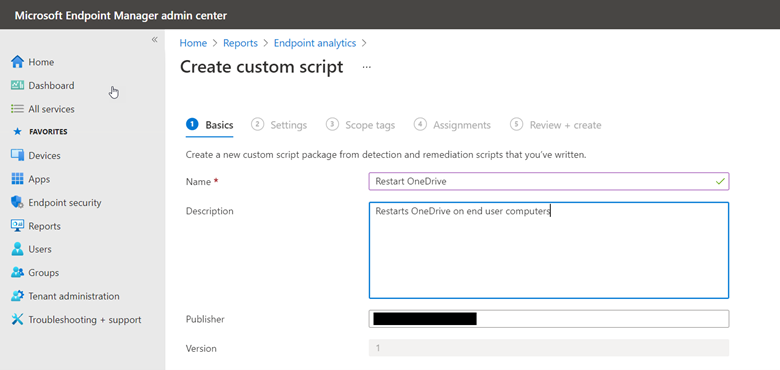
In the Create custom script window for 1. Basics, input information as follows:
Name: The name of your remediation job
Description: What the remediation job will do
Publisher: This will auto-populate; leave as default
Click Next
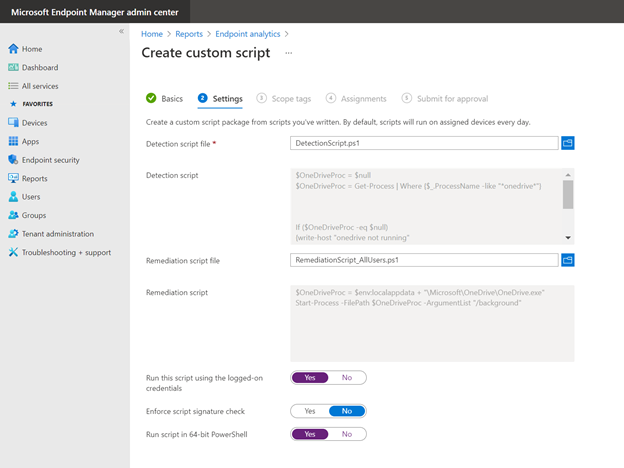
In the Create Custom script window for 2. Settings, input information as follows:
Detection Script File: Click the folder icon to add a .ps1 file. In this case, we are using a script we created named DetectionScript.ps1. Script contents are below.
$OneDriveProc = $null
$OneDriveProc = Get-Process | Where {$_.ProcessName -like "*onedrive*"}
If ($OneDriveProc -eq $null)
{write-host "onedrive not running"
Exit 1
}
Else
{write-host "onedrive is running"
Exit 0
}
Remediation Script File: Click the folder icon to add the .ps1 file. In this case, we are using a script we created named RemediationScript_AllUsers.ps1. Script contents are below. Please note that this script is applicable for use when the OneDrive.exe process is located under C:\Users\%USERNAME%\AppData\Local\Microsoft\OneDrive on the end-user machines.
$OneDriveProc = $env:localappdata + "\Microsoft\OneDrive\OneDrive.exe"
Start-Process -FilePath $OneDriveProc -ArgumentList "/background"
Run this script using the logged-on credentials: Yes
Enforce script signature check: No
Run script in 64-bit PowerShell: Yes
Click Next
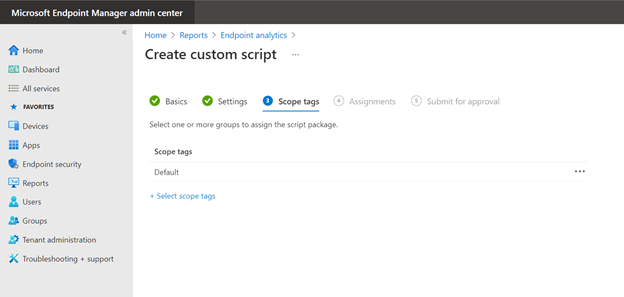
In the Create Custom script window for 3. Scope tags, leave Scope tags as Default. Click Next
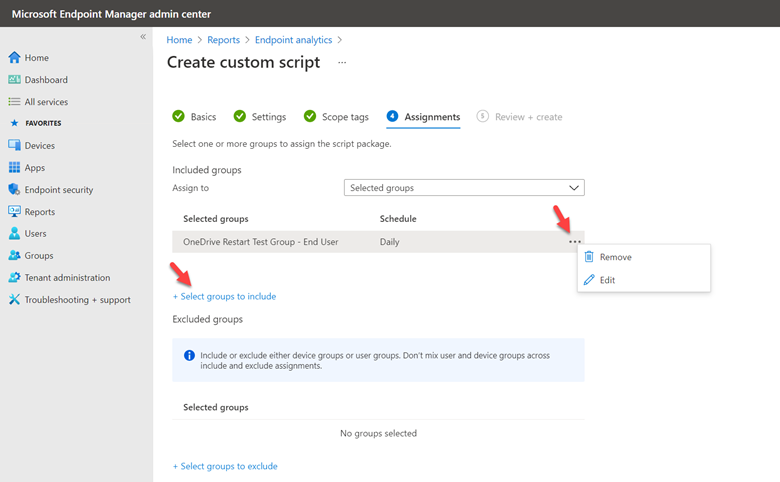
In the Create Custom script window for 4. Assignments, assign the applicable security group. For this exercise, we created a “OneDrive Restart Test Group – End User” security group in Azure AD, and added the applicable end-user devices to this group via the +Select groups to include a link as shown below. It is always recommended to use a test user group first to ensure the desired outcome is obtained, before fully implementing the remediation job for all users!
By default, after assigning a group, the Schedule will be set to Daily, but you can adjust it to Once or Hourly by clicking on the ellipses icon and selecting Edit.
Click Next
Review and click Create
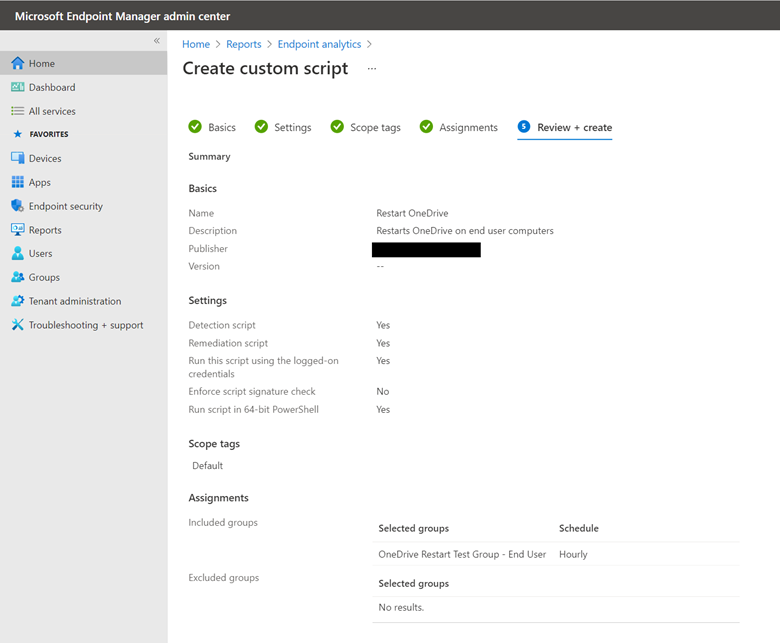
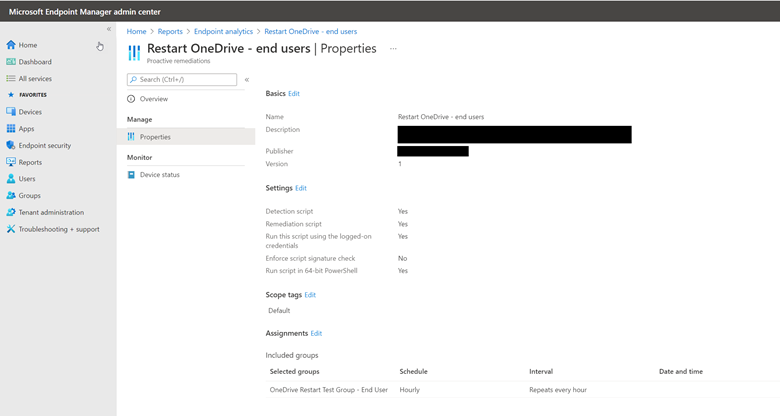
Your new Proactive Remediation job will be added! From here, you can click on the job name and this will allow for you to view the Properties as well as the Device Status by clicking on the applicable links under Manage and Monitor, respectively:
Properties:
Device Status:
Remediation Status will indicate ‘Not run’ when the Detection Script has verified at check-in that OneDrive.exe is currently running on the end-user machine referenced, as this would mean that there is no need to execute the Remediation Script to restart OneDrive!

You can also test the remediation job by manually stopping OneDrive on a machine that is part of the group to which the remediation job is assigned. Once the check-in interval has been reached, check back in the Device Status section to verify the outcome of the detection and remediation.
Proactive Remediation Jobs are just one of the many, many functionalities you can use Microsoft Endpoint Management for to better your business and its security stance.
If you need any help with the steps or want to discuss further the benefits of OneDrive Contact us today!
Related Posts:
- HOW TO ACCESS AND USE MY COMPANY'S SHAREPOINT DOCUMENTS
- CONDITIONAL ACCESS POLICIES: REQUIRE MFA FOR GUESTS IN O365 TENANT
- PRODUCTIVITY, COLLABORATION TOOLS AND IT SERVICES THAT WILL HELP YOUR BUSINESS BECOME MORE EFFICIENT