

Multi-Factor Authentication (MFA) is the use of more than one security mechanism to access your accounts instead of the outdated way of setting a single password you can remember (or unfortunately write down where others can access it) and hope that nobody else can guess it to gain access to your account.

One of the advantages of using MFA is the peace of mind that comes along with knowing your account cannot be accessed simply by a password. This is especially helpful because passwords are often easily obtained by individuals using password cracking. The fact that you also need to authenticate from a second device (often your cell phone) or your biometric fingerprint, stops the person attempting to get in with your password as they can’t get past the second factor. Without your phone, which is usually in your possession, or your finger, the hackers can’t get in.
There are many different types of Multi-Factor authentication, such as text codes, app codes, biometrics and hardware tokens. The most common and simplest to use are text codes or app codes. App codes simply require a smartphone that can receive texts. There are many types of these applications that you can set up. A few I like are Microsoft Authenticator, Google Authenticator, Authy and Duo.
First, if you are setting this up at your workplace for very common services such as Office365 your IT administrator might need to enable your account to use Multi-Factor Authentication in their admin portal. Once they do this you will then be able to set up your MFA for your Office Accounts which will include all of your Office Applications as well as Microsoft Teams. You also can set this up on personal accounts for many common Cloud services which is very advisable.
Steps to Set up MFA on Office365
Here is what the setup looks like when you are enrolling your device for Office365.
- The screenshot below has the first option to use the authenticator app which is a great method. If you choose to use an app to authenticate, you will need to first go to the Apple or Google Play store for Android and download the app authenticator you wish to use.
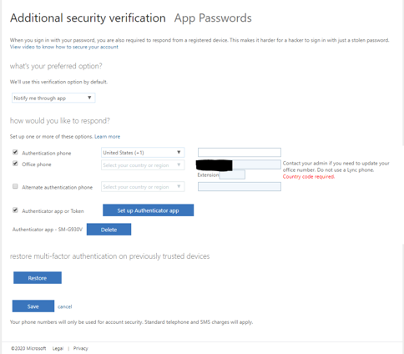
- Then you will fill out the appropriate information in the screen above on your computer via the Office365 portal. The first verification dropdown is for the type of multi-factor authentication you would like to use, such as text your phone, call your phone and the one we selected, “Notify me through app”, which uses one of the authentication apps we discussed previously.
- On your next login to one of your O365 applications, you will be prompted to authenticate. To do this, open your authenticator app on your phone and type the code it is displaying into your O365 application. Your company can also configure this, so you get a popup that allows you to click on “Approve Request” versus having to enter the numerical code.
The MFA token lasts on any given device for 14 days, but if you are actively using the device it keeps renewing so you only need to update on each individual device every 90 days.
There are many other commonly used applications that allow you to set up MFA. It is a great idea to implement MFA on all accounts that allow it.
Steps to Set up MFA on Google Accounts
Google Accounts: For your Google accounts you can turn on MFA by doing the following (I chose to authenticate by text in the below example and use the Google Authenticator app as a backup in case my text message service is having issues):
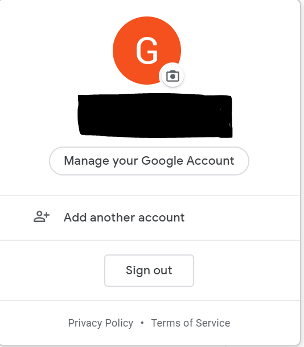
- Login to account, click “Manage your Google Account”
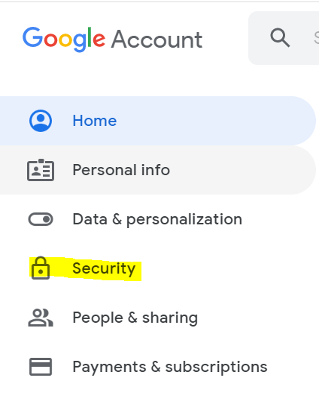
- Click on “Security”
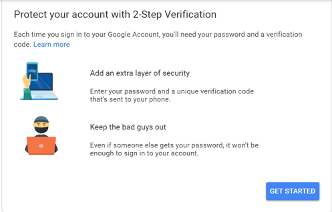
- Click on the arrow on the “2-Step Verification” Line

- Click “Get Started”
- Sign into your account with your password
- Then follow the prompts to add your device, you will then receive an approval on your device followed by a text message with a code to verify and you will have successfully configured MFA for your Google account
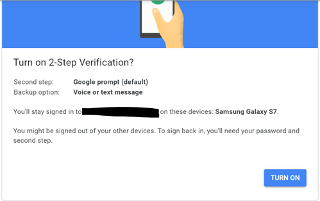
- Click “Turn On”
You have now successfully set up MFA on your Google account.
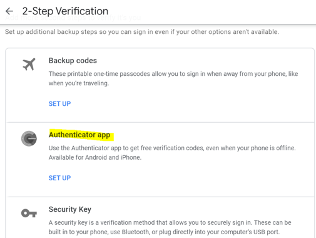
You can also set up a backup method using the Google Authenticator App. ![]()
- Under the Authenticator App click “Set Up”
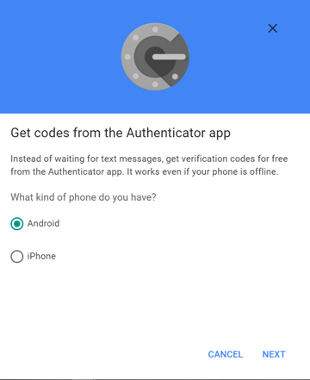
- Select Phone type and click "Next"
- Scan barcode with a barcode scanner from your phone and then click “Next”
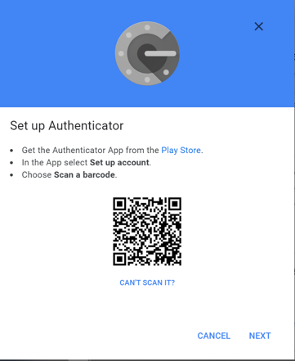
- Then click the link in your phone and you will see the Google account added to your Google Authenticator App
- Enter the code from the App and click “Verify”

- Then click “Done”
The above setups for both Google and O365 and their respective phone applications is relatively the same process across most other applications.
Protect yourself now and consider turning on MFA for all of your accounts for a much safer experience! If you need more help, please feel free to contact us.
Related Content:
- Azure AD Authentication to Azure VM
- Active Directory Authentication CIFS(SAMBA) File Sharing W/UBUNTU 20.04
- AD Authentication With SSSD Without Joining Domain Without VPN
- Two-Factor Authentication: What Is It and Why Do You Need It?

.png)
.png)