

Table of Contents:
1. Microsoft Labels and Information Protection
2. Sensitivity Labels Overview
3. Using MCAS to apply Microsoft Sensitivity Labels
4. Configuration
5. Integration with Microsoft Copilot
6. Licensing Requirements
7. Management
8. Challenges
Microsoft Sensitivity Labels and Information Protection
In the modern remote workplace, it’s become essential to protect data beyond the boundaries of the corporate network. Enter Microsoft Information Protection and Sensitivity Labels.
Sensitivity Labels allow you to apply lasting protection to files regardless of where they are stored. The trick is often making sure that the appropriate label is applied to content automatically or with as little administrative effort as possible. Fortunately, we can leverage Microsoft Defender for Cloud Apps (MCAS) to do just that. If your files are stored in SharePoint Online or OneDrive, we can apply sensitivity labels by default to new and existing files in a defined folder or document library thus taking the burden off the end user to apply labels when it’s absolutely necessary.
Sensitivity Labels Overview: Purpose and Uses
Using MCAS to apply Microsoft Sensitivity Labels
To accomplish this task, you’ll need to confirm a few prerequisites:
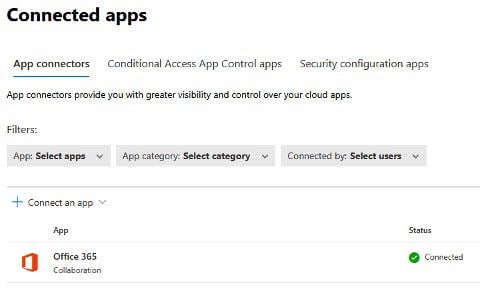
First, Office 365 Collaboration apps must be connected to Defender for Cloud Apps as seen below.
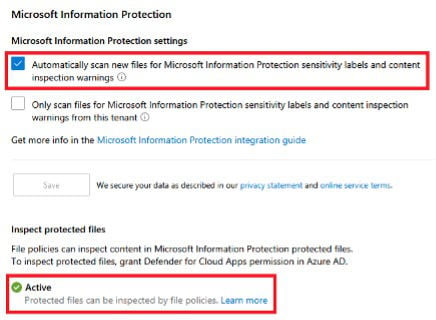
Next, from the MCAS advanced settings page, we’ll need to make sure that Microsoft Information Protection (MIP) is configured to automatically scan new files for sensitivity labels and that MCAS has consent to inspect content in MIP protected files.
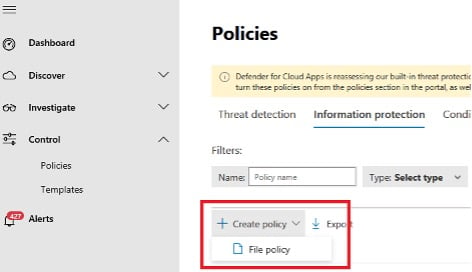
Now that we have the prerequisites taken care of, we’ll begin creating our auto-labeling policies. From the Defender for Cloud Apps dashboard, create a File Policy under Control > Policies > Information Protection > Create policy.
Next, we’ll give the policy a name, filter the policy scope to SharePoint Online, and apply it to a selected folder as seen in the image below. Be sure to use the filter options when looking for the folder that you want to scope the policy to as there may be many to choose from. Also note that the default SharePoint document libraries are named “Shared Documents”, and these can be identified by inspecting the URL Path and finding the site that the folder is created in.
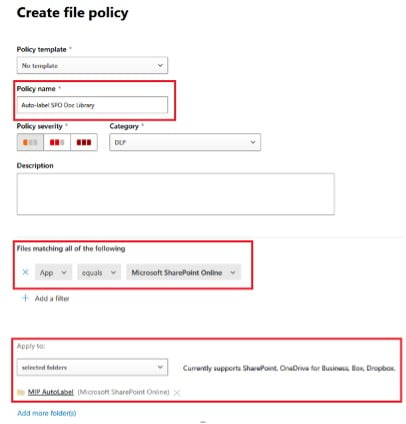
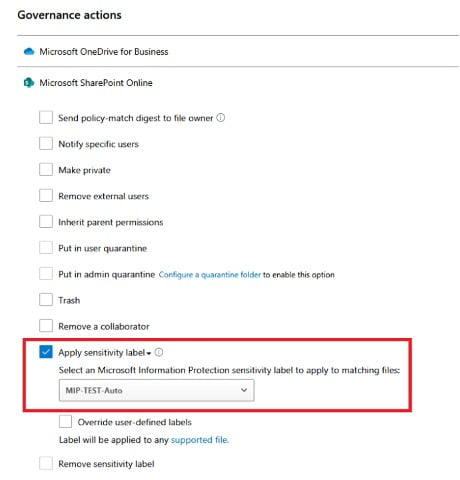
Once we’ve selected the folder, we’ll assign our governance action of applying a sensitivity label to all files in the library or folder.
Click Create and we’re done!
It’s important to note that MCAS will need to crawl and index the folder if it was recently created and that can take some time. It's also recommended to create a file or move an existing file into the folder right away for MCAS to detect activity. Label application is not instant but is typically applied within a few minutes of adding a new file.
There are additional policies that can be deployed to block external access to new content until it has been scanned by at least one DLP policy but that’s for a different blog post. Happy labeling!
If you have any questions, or want some additional information, please do not hesitate to contact us.
Related Posts:
- HOW TO MOVE FILES IN MICROSOFT SHAREPOINT USING POWER AUTOMATE
- HOW TO ACCESS AND USE MY COMPANY'S SHAREPOINT DOCUMENTS
- AITM PHISHING ATTACKS: WHAT TO DO WHEN MFA IS NOT ENOUGH
.png)

.png)